Microsoft XPS Document Writer is a handy feature that comes preinstalled in Windows. It let you create an XPS file of content available on any document or web page without using a third-party program. XPS files created using this feature can be easily opened using XPS Viewer that also available in Windows 10.
Some users reporting that XPS Document writer options aren’t available when they’re trying to install a new printer. Apart from this, XPS Viewer or XP Service is also missing. Due to this reason, they’re unable to save documents or files as PDF.
It could be possible that you have mistakenly removed it from your computer or there might be other scenarios due to which Microsoft XPS Document Writer is missing on your Windows 10.
Fortunately, it is possible to reinstall Microsoft XPS Document Writer. In case, you don’t know how to do that, then you can follow our step by step instructions on how to do that:
In the Start menu search type “Turn Windows feature ON or OFF” and when the same results appear, click to open it.
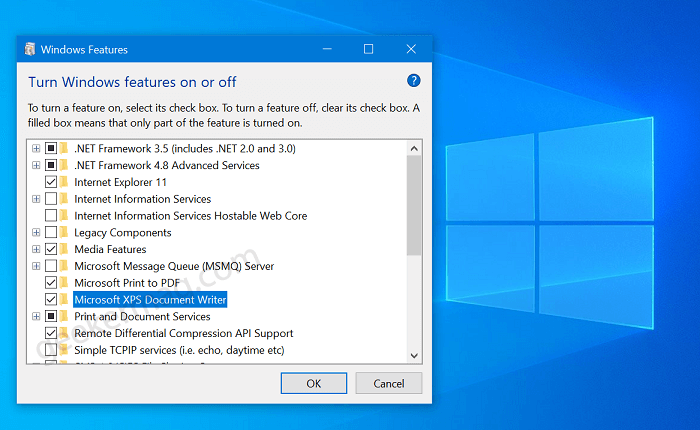
Windows feature window will appear showing you a complete list of features that you have installed or not on your Windows 10 PC.
In the list, you need to look for a Microsoft XPS Document Writer. If the box for the same option is unchecked, then this confirms that it’s not installed on your computer.
Check the box and then click the OK button. Doing this will show you “Windows completed the requested change” install the feature and to complete the installation you need to reboot your computer.
In case, Windows feature window confirms that it’s installed already, but you’re unable to find it on your computer, then it is possible that it’s happening due to a bug. In this situation, remove and reinstall MXDW following the steps discussed above. Remember to install check the box and to remove uncheck the box.
Doing this will definitely bring Microsoft XPS Document Writer back in Windows 10
Apart from this, XPS Viewer is official apps to open .xps file created by Microsoft XPS Document Writer. Unfortunately, Microsoft has made it an options feature but you can reinstall if you want. Here’s how you can do that:
In the Start menu search type Add an optional feature and when the same setting appears in the results, click to open it.
 in Windows 10" width="700" height="413" />
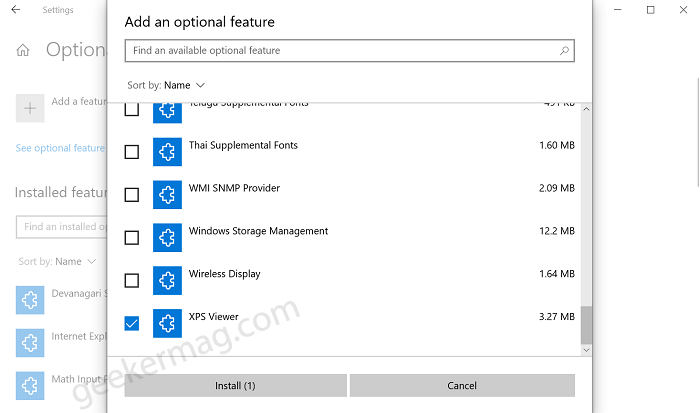
On the Optional feature settings page, click on the Add a feature button. Doing this will open Add an optional feature dialog, scroll down to find XPS Viewer. Check the box for the same and then click on the Install button.
Doing this will install XPS Viewer on your Windows 10 PC.
That’s all about this blog posts on How to Install Microsoft XPS Document Writer if Missing in Windows 10. If you still have any query feel free to ask us via comments.
Previous Article Microsoft Network Adapter Multiplexor Protocol (Explained) Next Article Request Header Or Cookie Too Large Error (Explained and Fixed)Viney Dhiman, the mind behind GeekerMag, is a seasoned content writer with over 12 years of experience. Specializing in simplifying complex tech concepts, he covers Windows OS, Android, iOS, web apps, and product reviews. His work can be found on popular tech websites like Gizmodo and The Verge, and he has been interviewed by the Microsoft Edge team.